


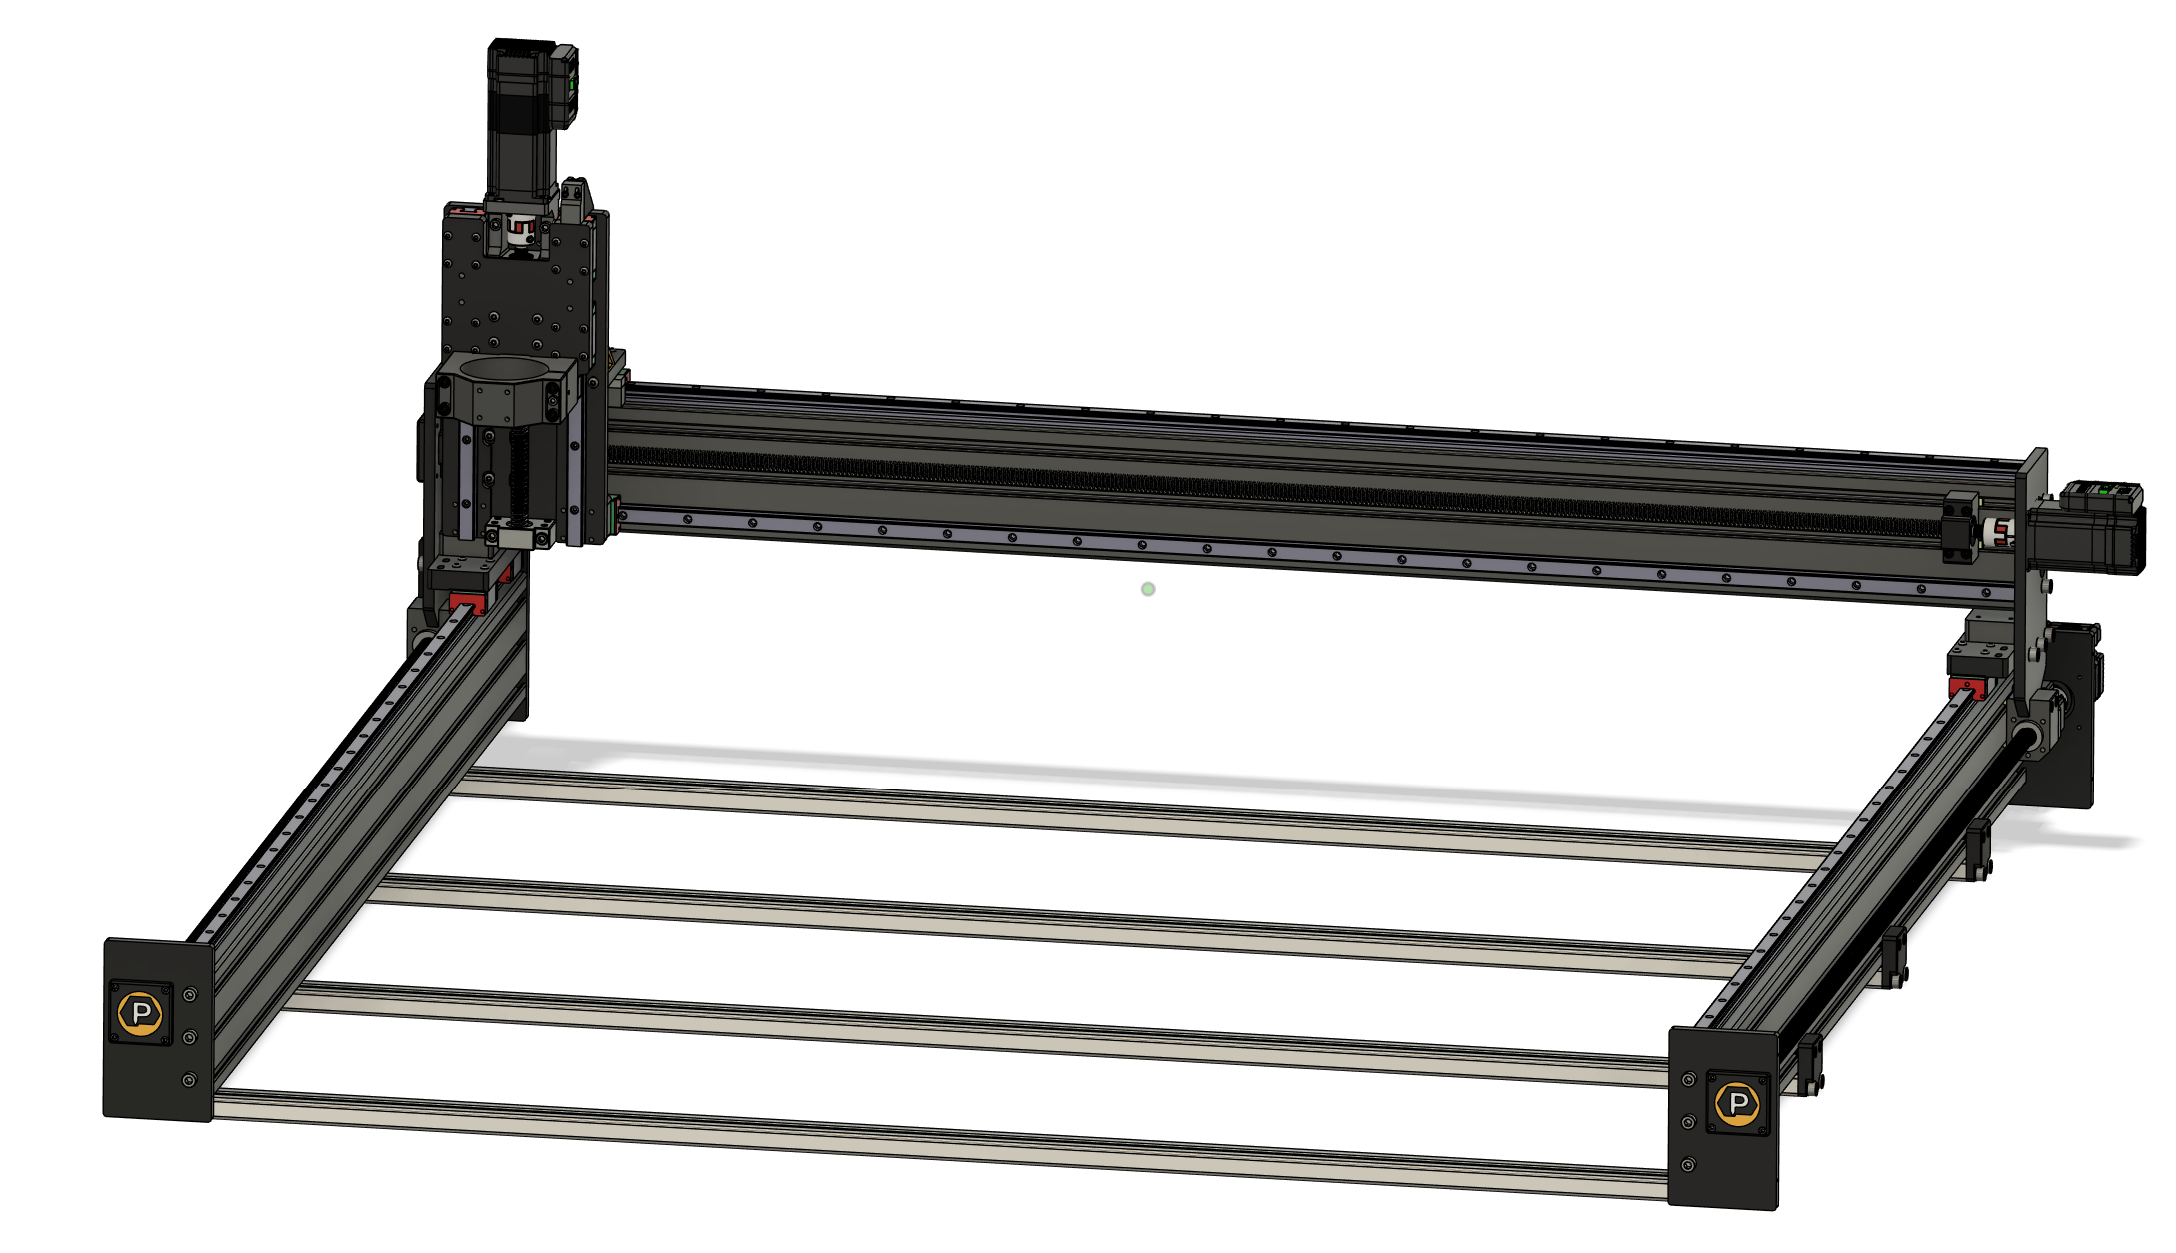
Welcome to your new Dominator Core CNC Machine!
This page is your starting point for online references to help with your assembly. Before diving into individual steps, please review this guide to make sure you’re fully prepared.
1. What You’ll Need Before Starting
-
A clean, well-lit workspace with room to maneuver around your machine.
-
A set of metric hex/Allen keys and basic hand tools.
-
Access to this Knowledge Base on a laptop, tablet, or phone during assembly.
-
Optional: a second person to help with lifting heavier components like the gantry.
2. Recommended Assembly Flow
The Dominator Core ships in carefully organized parts and subassemblies. The manual is broken into easy-to-follow steps, but here’s the overall order of operations:
-
Bed & Y Assembly – Building the base and squaring the Y extrusions.
-
Gantry Installation – Mounting the gantry and ensuring alignment.
-
Z-Axis & Spindle Mount – Installing the Z carriage and spindle mount.
-
Installing Stepper Motors – Installing stepper motors
-
Installing Homing Switches – Installing homing switches
-
Attaching Cable Chains – Installing Chain brackets and Cable Chains
-
Attach Gantry and Tighten Up – Slide gantry into the nut carriages and tighten screws.
At this point the assembly switches gears into electronics which is mostly covered by our Conversion Kit docs here: https://support.pwncnc.com/kb/section/100/
That said, we do have planned several "Dominator Core specific" articles which will better tweak those docs as they specifically apply to the Dominator Core.
These articles are still under development. Please reach out if you have questions.
-
Wiring & Routing Stepper Cables – Attach stepper cables and run them properly around the machine.
-
Wiring & Routing Homing Sensor Cables – Attach homing sensors and run them properly around the machine.
-
Final Adjustments – Squaring, tramming, and checking smooth motion.
-
Power-Up & Test Run – Powering on your system for the first time
3. Assembly Tips
-
Take your time – precision during assembly ensures precision while cutting.
-
Follow the KB steps in order – each page builds on the previous.
-
Don’t force parts – everything is designed to fit. If something seems off, double-check orientation and hardware.
-
Ask for help – if you get stuck, our support team and community forums are here for you.
4. Before You Begin
-
Skim through the upcoming pages to familiarize yourself with the flow of the build.

