


Manual Mode Operation
Spindle Systems have a convenient switch on the side of our enclosure which lets you switch between "Manual Mode" and "Automatic Mode". When flipped to manual (up or 1 position) you can hit the run button on the VFD's keypad and turn the dial controlling the motor just like you would a palm router.
See more: https://support.pwncnc.com/kb/article/658-phase-2-manual-mode-operation/
Spindle Kits come programmed for immediate use in "Manual Mode". This means you hit the run button and turn the dial to start your spindle motor just like you would a palm router.
See more: https://support.pwncnc.com/kb/article/655-phase-2-manual-mode-operation/
Wiring your Spindle to Warthog Controller for Automatic Mode Operation
Preparing Controller for Wiring
We've discovered through a bunch of testing that the stock spindle plug on the Warthog controller from Carbide3d just isn't good enough for 3rd party spindle kits.
Not to worry... we've developed a super simple workaround in the form of a pigtail inlet wire that can be installed into your Warthog controller easily enough.

Completely unplug your controller and perform the following steps:
First step is to take a 30/64" drill bit and add a small hole to your controller's cover as follows:
Pro-Tip. Wait until after you're out of your CNC machine's warranty period before making permanent modifications to the machine.
 .
. 
Now install the pigtail into place and plug the 2-pin dupont connector onto the ICSP header.


Lastly seal your controller back up and you're all set for a plug-n-play experience.

And... finally, plug in the 6-pin control cable between the VFD and the controller.
Spindle System Wiring
See more: https://support.pwncnc.com/kb/article/659-phase-3-controller-wiring-and-automatic-control/
If you have our spindle system, then it's really easy to plug everything up.
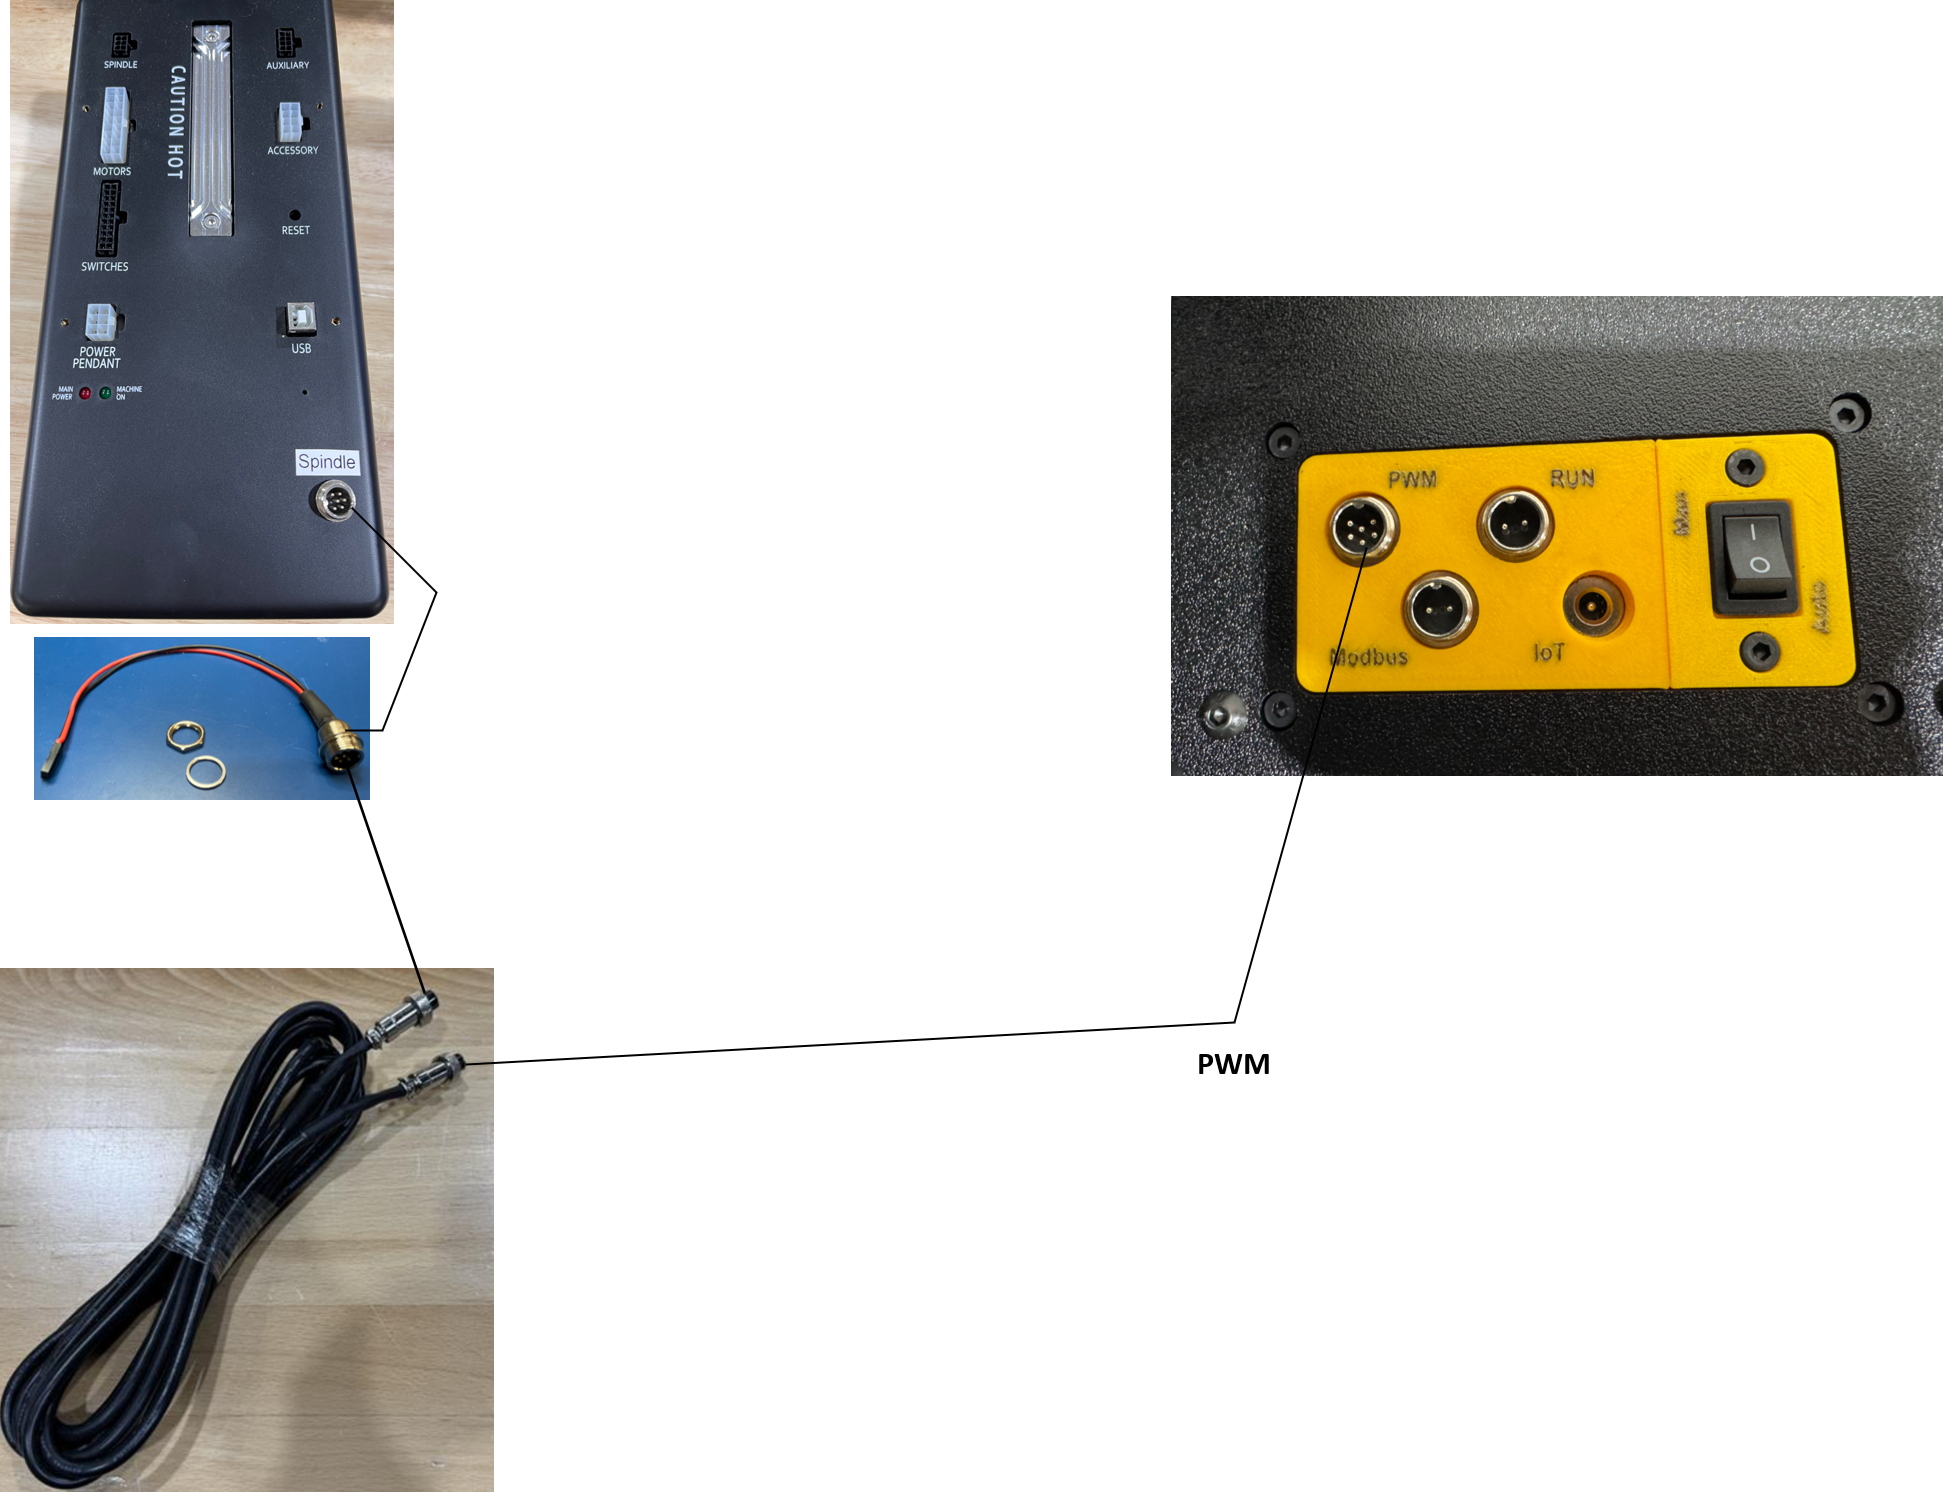
Spindle Kit Wiring
See more: https://support.pwncnc.com/kb/article/656-phase-3-controller-wiring-and-automatic-control/
If you have our spindle kit, then you'll be digging into the VFD directly to wire it up. Connect it as shown below:

Setting up your VFD for Automatic Mode Operation
This mode is where your CNC controller controls the VFD via a simple PWM variable voltage signal. For Warthog's this is 0-5v representing 0-24000rpms.
Running Spindle Systems in Automatic Mode
See more: https://support.pwncnc.com/kb/article/659-phase-3-controller-wiring-and-automatic-control/
We have pre-programmed your VFD to run in automatic mode when the Manual Override switch is flipped to automatic (down or 0 position). The vfd will monitor the PWM (red wire) and GND (black wire) for how fast the controller is instructing the VFD to spin the spindle motor. You must still hit the "RUN" button on the VFD's keypad to change the vfd from standby/stopped mode (blinking keypad display) to spin/forward mode (solid keypad display).
Running Spindle Kits in Automatic Mode
See more: https://support.pwncnc.com/kb/article/656-phase-3-controller-wiring-and-automatic-control/
Our spindle kits do not come with a vfd enclosure and as such you're expected to provide that as well as properly wiring up the high-voltage electrical. If unsure, consult an electrician.
Without our specially designed enclosure, our spindle kits can only run in Manual-Mode OR Automatic-Mode, you are unable to easily switch between them without changing a few program settings within the VFD.
To reprogram your VFD from Manual-Mode operation to Automatic-Mode operation you'll need to change the following settings:
Learn how to navigate your VFD programming here: https://support.pwncnc.com/kb/article/664-how-to-program-your-vfd/
P0.0.03 = 0
P2.0.02 = 9
P2.0.15 = 05.00
Your VFD will now monitor the PWM wires to know how fast it should spin the motor when in "Run Mode".
However you must still hit the "RUN" button on the VFD's keypad to change the vfd from standby/stopped mode (blinking keypad display) to spin/forward mode (solid keypad display).
Setting up your Shapeoko Controller for Automatic Mode Operation
We're experts in our VFD and spindles, but not experts in your particular CNC Controller. If you have specific questions, we will encourage you to seek advice and guidance from your machine provider.
We have played with Shapeoko controllers before and here are a few notes we've gathered as to how to configure gSender for controlling a spindle:
From within Carbide Motion V5 navigate to the Settings->Options and change the Spindle to “VFD Spindle”. Hit OK at the bottom and confirm sending configuration to your machine.


If you are operating on V6 or higher, you will need to reconfigure Carbide Motion from initial machine setup to see the spindle enable button.
That’s it… just remember to properly configure your RPM’s when working within Carbide Create or other CAD software and with a carbide controller hit run after every power cycle or stop/reset of the VFD.

