


Special Note: We are currently unable to personally verify this information, however we have worked with several customers who have said they were successful.
Delixi VFD Programming for the Redline CNC Controller is relatively simple and closely aligns with programming used on their Onefinity-Blackbox (Clone of BuildBotics) controller.
The Redline & their Blackbox (clone of BuildBotics) both use Modbus to control the vfd which has several advantages over traditional PWM.
Onefinity Blackbox -> Redline
If you're moving from a Onefinity Blackbox controller to Redline, then there should be no need to make programming changes however you will need an updated control cable.
If you have our Spindle Kit (with unenclosed VFD): https://pwncnc.com/products/control-cable?variant=44989134438539
If you have our Spindle System (with enclosed VFD): https://pwncnc.com/products/control-cable?variant=44989134405771
Onefinity Elite -> Redline
If you're moving from the Onefinity Elite (with Masso Touch Controller) to the Redline, then you'll need to do a few things.
First you'll need a new control cable since the Redline uses Modbus to control the spindle.
If you have our Spindle Kit (with unenclosed VFD): https://pwncnc.com/products/control-cable?variant=44989134438539
If you have our Spindle System (with enclosed VFD): https://pwncnc.com/products/control-cable?variant=44989134405771
Next there is a minor bit of VFD programming necessary to make the switch:

These two settings will switch the VFD from receiving commands over PWM to receiving commands over Modbus.
In the Redline controller, specify that you have the Redline Spindle since their Motor & VFD are identical to ours.
More information to follow.
Update 3/9. Customers have started to receive their Redline controllers and we have identified an issue with our initial Cable Adapter release.
If you hook up your PwnCNC Spindle to the Redline Controller and you're seeing this on your controller's screen:


If you received our cable adapter prior to 3/9/2026... then this is likely the issue.... the wires are simply swapped: SG(-) and SG(+) are wired backwards.
There are two ways to solve this depending on how comfortable you are opening our VFD Enclosure.
Easy Way: We have corrected the wiring with our cable adapters and can send you a replacement adapter that will get you up and running.
The main requirement is a few days to ship this adapter to you and for you to receive it.
Please reach out to us at [email protected] and we'll get a replacement adapter on the way to you.

Hard Way: While i say "harder" it's relatively easy if you follow these instructions:
1. Open the VFD Enclosure like this... but remember to unplug it entirely first!
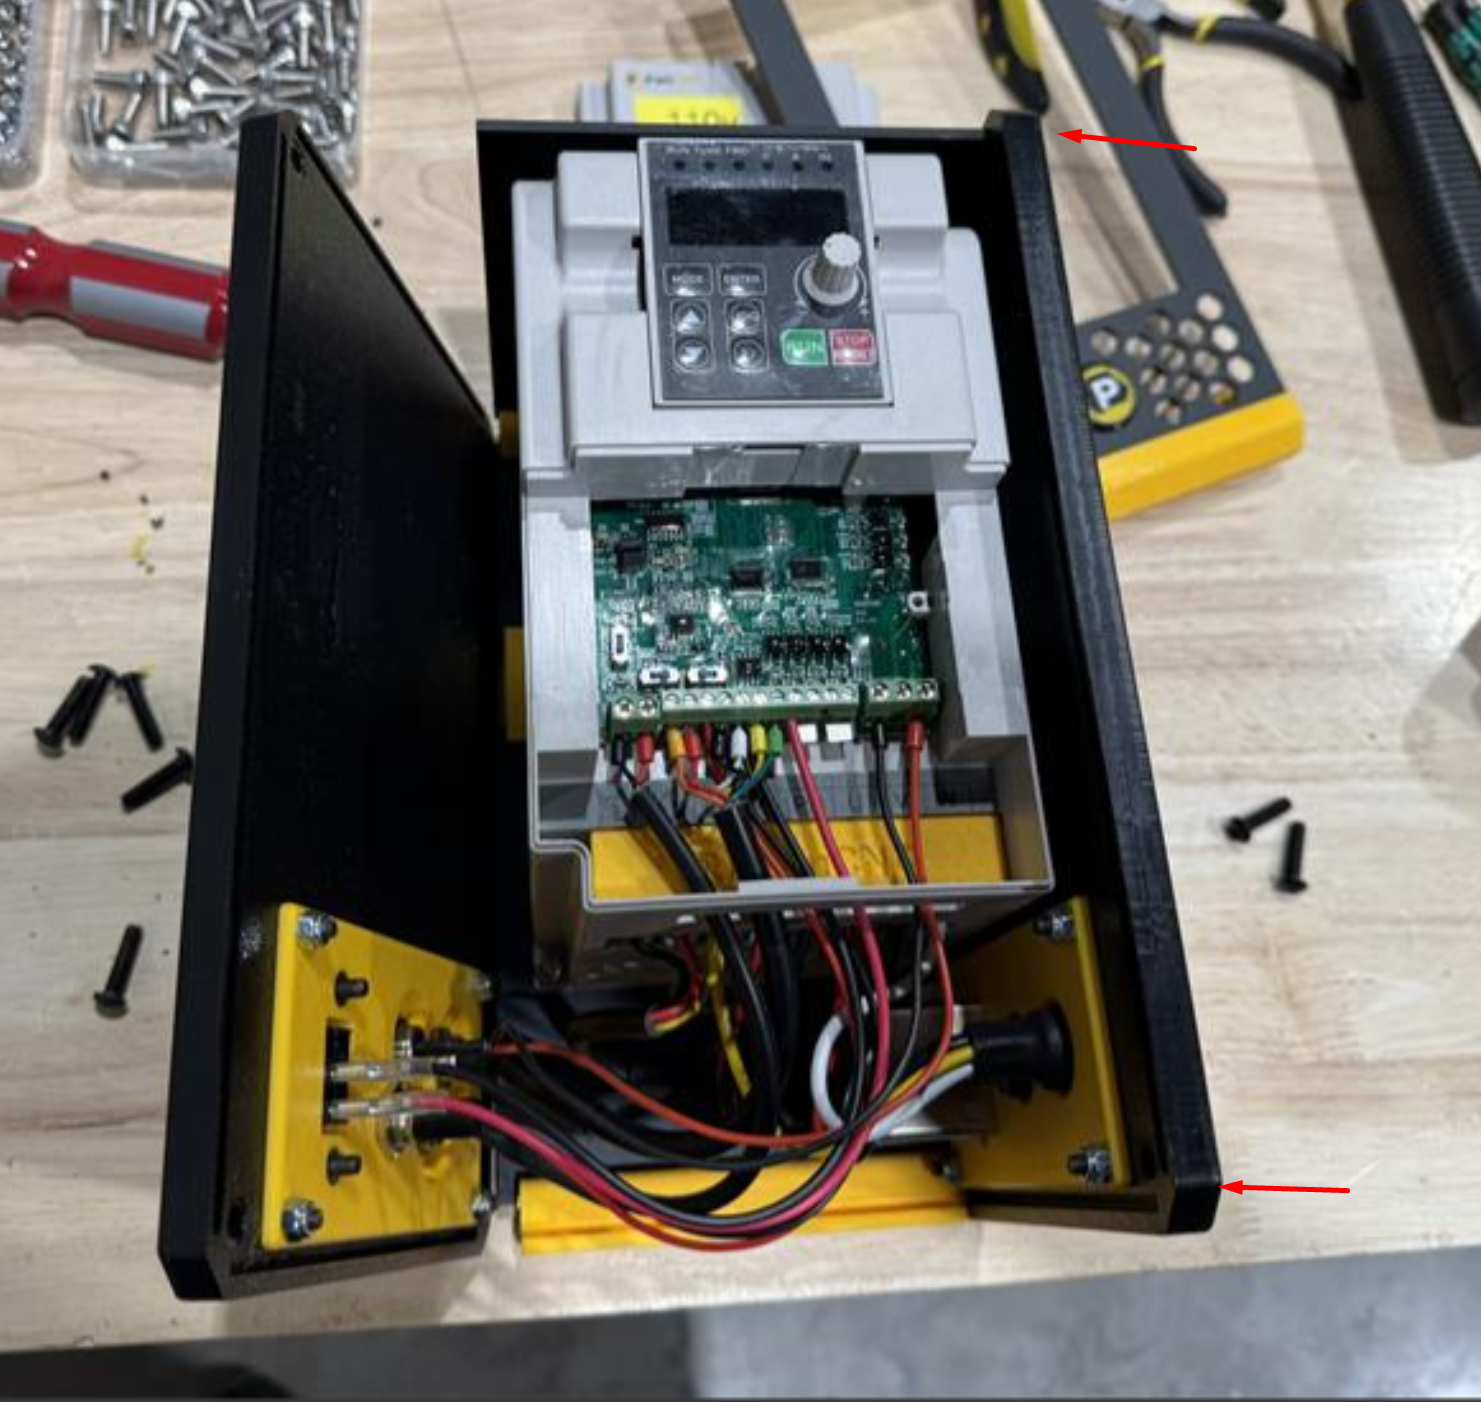
Two black button screws on the right and five on the left will open the enclosure giving you access to the VFD inside.
2. Open the small VFD cover exposing the low-voltage wires on-top.
The two wires on the far left are what you'll want to swap.

Red needs to wire into SG(-) on the left.
Black needs to wire into SG(+) on the right.

