


Welcome to Your PwnCNC Conversion Kit
A PwnCNC Conversion Kit replaces your machine’s original control system with a MASSO-based controller and conversion wiring. Depending on the configuration ordered, your kit may also include replacement closed-loop motors, drivers, homing sensors, and additional integration hardware.
This article is your starting point. Read it completely before removing your original electronics or applying power to the new system. It explains what PwnCNC has prepared, what remains specific to your machine, and the recommended order for completing the conversion.
Important: Do not skip ahead to powering, jogging, or homing the machine. Complete the mechanical installation, wiring, grounding, and pre-power inspections first.
Before You Begin
Before disconnecting or removing your original controller:
- Read What to Know Before Converting Your CNC Machine.
- Back up or record the original controller settings when possible.
- Take clear photographs of the original wiring, connectors, motors, sensors, and cable routing.
- Label any machine wiring that will be reused.
- Record the machine manufacturer, model, size, motor information, and sensor details.
- Verify the available input voltage for the controller, power enclosure, and spindle/VFD.
- Inventory the conversion-kit components before beginning installation.
- Disconnect the machine and related equipment from power before modifying any wiring.
Do not discard the original controller, motors, cables, connectors, or mounting hardware until the conversion has been completed and tested successfully.
Identify Your Conversion Kit
PwnCNC offers two primary MASSO conversion paths. Confirm which kit you purchased before following any wiring or configuration instructions.
Core Conversion Kit
The Core Conversion Kit uses the MASSO Core controller and standard terminal-based wiring with ferrules and Phoenix-style connectors. It provides a flexible conversion platform for customers who are comfortable completing more of the machine-specific wiring.
Review the Core Conversion Kit contents
Advanced Conversion Kit
The Advanced Conversion Kit uses the MASSO G3 Touch Advanced controller with additional prewired integration hardware and locking circular connectors. It is intended for installations requiring greater accessory integration, additional inputs and outputs, or future ATC expansion.
Review the Advanced Conversion Kit contents
Always follow the wiring article written for your specific kit. Core and Advanced wiring instructions are not interchangeable.
What PwnCNC Has Prepared
Your conversion-kit components are prepared and bench-tested before shipment. Depending on the configuration ordered, PwnCNC has:
- Installed the appropriate MASSO controller and enabled the applicable controller features.
- Loaded a safe starting configuration into the controller.
- Built and tested the supplied power and controller assemblies.
- Prepared and labeled the included cables.
- Verified included motor and driver operation when replacement motors are part of the order.
- Tested prewired connections and integration hardware included with the kit.
These checks confirm the operation of the supplied assemblies before installation. They do not replace the machine-specific verification required after the components are installed on your CNC.
What Remains Machine-Specific
Every CNC machine is different. Its frame, travel, screw pitch, motor orientation, sensor placement, cable routing, and accessories determine the final installation and configuration.
You will still need to:
- Mount and align the motors and couplers.
- Choose safe locations for the controller and power enclosure.
- Install and position the homing sensors.
- Route cables with appropriate bend radius and strain relief.
- Complete machine-specific signal and power wiring.
- Ground the machine frame and connect shield drains correctly.
- Verify motor direction, travel limits, and homing direction.
- Confirm every MASSO input and output used by the machine.
- Configure and test spindle/VFD control when applicable.
- Validate the completed installation before running a job.
Your controller contains a starting configuration—not a guaranteed final configuration for every machine. Travel limits, axis directions, homing behavior, sensor logic, and other machine-specific settings must be verified after installation.
Your Conversion Roadmap
Follow the steps below in order. Read each applicable article completely before beginning that stage.
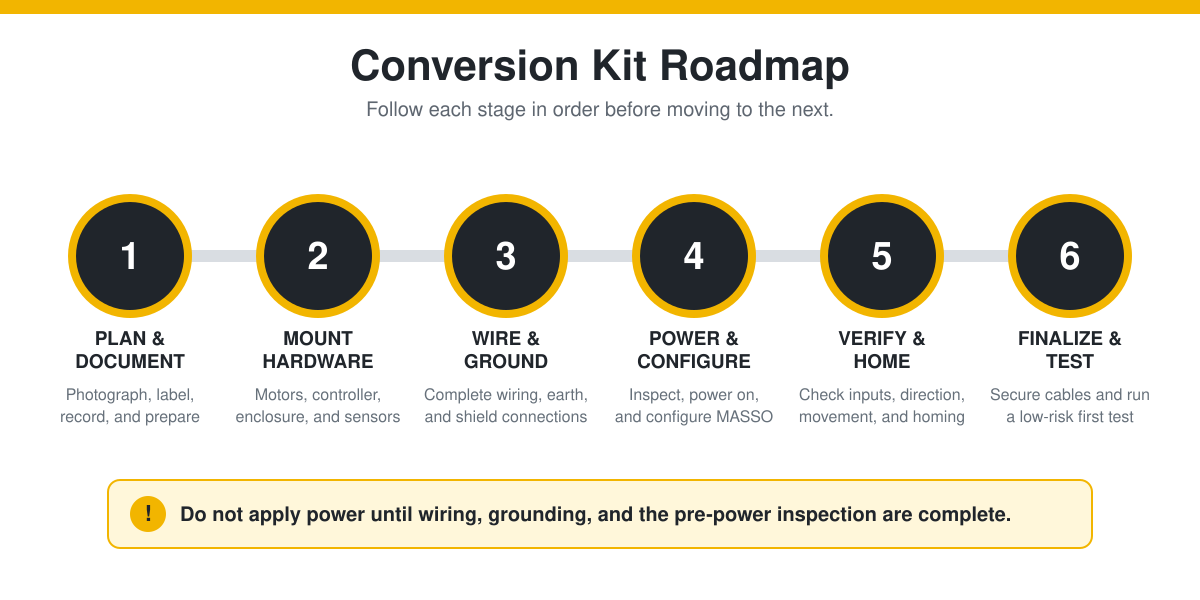
1. Prepare and Document the Machine
Review What to Know Before Converting Your CNC Machine, photograph the original installation, record the machine information, and disconnect all power.
2. Confirm the Kit Contents
3. Install Motors and Couplers
Motor Mounts, Couplers, and Shaft Alignment
Install the motors and couplers, but leave enough adjustment available to complete final alignment.
4. Plan Cable Routing
Drag Chains and Cable Management for CNC Conversions
Route cables loosely during the initial installation. Do not fully tighten zip ties or finalize cable management until the machine has passed its movement and homing tests.
5. Install the Homing Sensors
Installing and Mounting Proximity Homing Sensors
Install the sensors mechanically and confirm that each sensor can be triggered before an axis reaches a hard stop.
6. Review the Wiring Overview
Conversion Kit Wiring Overview
Understand the power, motor, sensor, input, output, and spindle-control connections before beginning the detailed wiring process.
7. Complete the Wiring for Your Kit
Follow only the article that matches your conversion kit.
8. Complete Grounding and Shield Connections
Conversion Kit Grounding Guide
Complete and inspect grounding before applying power. Verify machine-frame grounding, protective earth connections, and cable shield drains.
9. Verify Closed-Loop Driver Settings
Closed-Loop Stepper Driver DIP Switch Settings
Confirm that the driver switches match the supplied motor and the intended controller configuration.
10. Perform the First Power-On Checklist
Inspect every connection before applying power. Stop immediately if you observe smoke, unexpected heat, unusual sounds, damaged wiring, or a persistent controller or driver alarm.
11. Access and Configure MASSO
Verify motor settings, axis assignments, sensor inputs, travel limits, and other machine-specific settings before attempting to home the machine.
12. Complete the Pre-Flight Inspection
Pre-Flight Checklist: Verify Your MASSO Control System Before Homing
Confirm that every required input responds correctly and that each axis can move safely away from its homing sensor.
13. Test Axis Direction and Homing
First Homing Cycle and Axis Direction Check
Be prepared to stop the machine immediately if an axis travels in the wrong direction or fails to respond to its homing sensor.
14. Finalize Cable Management
After motion and homing have been verified, secure the cables, confirm strain relief, and check that drag chains move freely throughout the machine’s full travel.
15. Run the First Test Job
First Test Job: Safe Speeds and Motion Checks
Begin with a simple air-cut or low-risk test. Do not begin with an important workpiece or an aggressive production program.
Machine-Specific Research and Downloads
PwnCNC is expanding its machine-specific conversion research to document sensors, motors, connectors, wiring, controller settings, and other details discovered while converting different CNC brands and models.
Additional resources may include:
- Brand- and model-specific compatibility findings
- Sensor and connector pinouts
- Motor and driver identification
- Technical drawings and mounting templates
- Wiring diagrams
- Community-provided MASSO configuration backups
Browse the Conversion Kit Knowledge Base for the latest installation guides, research, troubleshooting information, drawings, and downloads.
If Something Does Not Work
Do not repeatedly change wiring or controller settings without first documenting the original condition and identifying what each change is intended to test.
Use the Conversion Kit Troubleshooting section to work through the problem methodically. If the issue cannot be isolated safely, review When to Stop Troubleshooting and Contact Support.
Support
For product support, email [email protected].
Support requests are normally reviewed on Saturdays between 10:00 a.m. and 4:00 p.m. Central Time. PwnCNC does not offer telephone, live, or emergency support.
When contacting support, include:
- Your order number
- Machine manufacturer, model, and size
- Conversion Kit type: Core or Advanced
- MASSO controller serial number and software version
- A clear description of the problem
- Photographs of the relevant wiring
- Screenshots of applicable MASSO settings
- Any alarms or error messages shown
- The tests you have already completed
Our goal is to help you complete a safe, understandable conversion and end up with a control system you can operate with confidence.

